Most recently, I needed to display a knitted artwork for an upcoming show this weekend but I did not want a big ol' plastic men's torso crowding up my studio so I googled 'how to make a mannequin.'
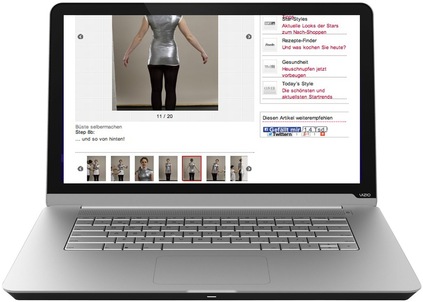
Up popped yet another fresh and earnest blog, posted by another fresh and earnest maker. And naturally not only has she posted sequential how-to photos but does the right thing by citing the blog that originally inspired her, which happened to be the Burda patterns website in German and which she re-capped so readers aren't lost in translation. Nobody gets anything out of this deal but a little personal maker pride and a good feeling that they're sharing the love with everyone else who loves doing stuff with our hands.
I appreciate the loosey-goosey instructions that are mostly communicated in pictures, requiring innovating as I go.
And so I did learn how to make a mannequin, and it was good.

Step 1: Find a victim of the size you need.
Step 2: Put him/her in an unwanted T-shirt (it will be sacrificed for the cause).
Step 3: Wrap some plastic wrap around the neck and at the bottom edge of the torso.
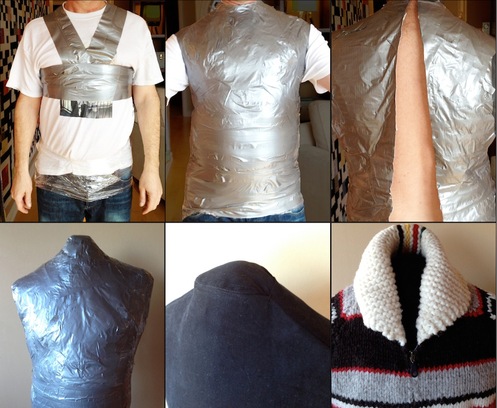
Step 4: Completely wrap the torso in duct tape. One of you will get dizzy from turning.
Step 5: Cut the T-shirt/tape shell off up the back.
Step 6: Remove from victim and tape the back edges together, then tape across the neck and the armholes.
Step 7: Stuff it with cushion foam chips.
Step 8: Stick the torso on some sort of stand (floor lamp base, dowel in chunk of wood, what-have-you. (I weighted a metal stand I had lying around with a 10kg barbell plate.)
Step 9: (I added this one) Sew up a fitted black microfiber casing.
Step 10: Staple the bottom together and dress (you and the mannequin).
The best part is that once the show's over, I can de-stuff the torso, lose the base and fold away the mannequin shell for future exhibits.
Just doing my tiny part in the hive full of maker bees.

 RSS Feed

